Black & Decker Edger LST136 Manuel d'utilisateur
Naviguer en ligne ou télécharger Manuel d'utilisateur pour Tondeuses à gazon Black & Decker Edger LST136. Black & Decker Edger LST136 User's Manual Manuel d'utilisatio
- Page / 48
- Table des matières
- MARQUE LIVRES
- INSTRUCTION MANUAL 1
- IMPORTANT SAFETY WARNINGS 2
- AND INSTRUCTIONS 2
- TABLE OF CONTENTS 2
- SAVE THESE INSTRUCTIONS 3
- COMPONENTS 4
- FOR BATTERY CHARGERS 4
- SAVE THESE INSTRUCTIONS 5
- READ ALL INSTRUCTIONS 5
- ASSEMBLY & ADJUSTMENT 8
- OPERATING INSTRUCTIONS 9
- WARNING:Neverattempt 10
- REPLACEMENT ACCESSORIES 11
- CAUTION: Toavoid 12
- SÉCURITÉ - DÉFINITIONS 17
- CONSERVER CES MESURES 18
- COMPOSANTS 19
- POUR LES CHARGEURS DE PILES 19
- POUR LES BLOCS-PILES 20
- AVERTISSEMENT : S’assurer 22
- MONTAGE ET RÉGLAGE 23
- NOTICE D’UTILISATION 24
- ACCESSORIES DE RECHANGE 26
- Depannage 28
- DE PODADORA / BORDEADORA 30
- DE LITIO DE 40 V MAX* 30
- MANUAL DE INSTRUCCIONES 30
- IMPORTANTES SOBRE SEGURIDAD 31
- COMPONENTES 32
- CONSERVE ESTAS INSTRUCCIONES 33
- LEA TODAS LAS INSTRUCCIONES 34
- MONTAJE Y AJUSTE 37
- INSTRUCCIONES DE OPERACIÓN 38
- ADVERTENCIA: 39
- ACCESORIOS DE REPUESTO 40
- MANTENIMIENTO 42
- DETECCION DE PROBLEMAS 43
- INFORMACION DE MANTENIMIENTO 44
- PARA USO EN EL HOGAR 44
Résumé du contenu
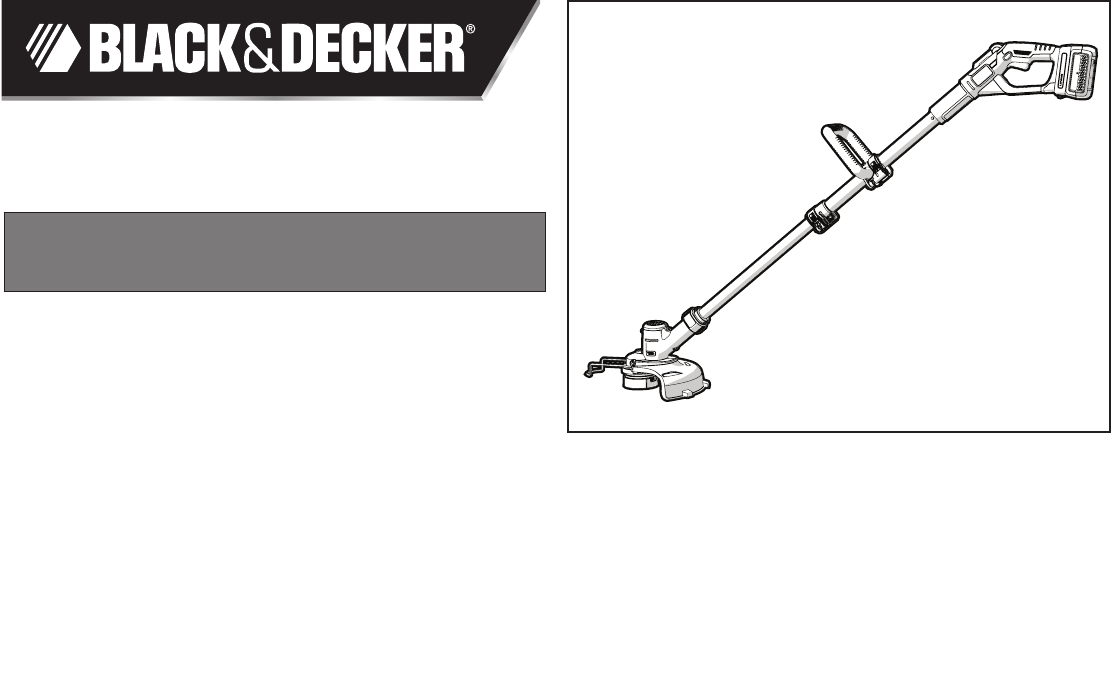
140V MAX* LITHIUM TRIMMER / EDGER INSTRUCTION MANUALKEY INFORMATION YOU SHOULD KNOW:• Theguardmustbeinstalledbeforetrimmingoredging-ifnot,
10 •Removethebatteryfromthetool. •Pressandholdtheheadreleasebutton(K1). •Whileholdingtheauxillaryhandle,rotatetheheadcounter
11HELPFUL CUTTING TIPS •Use the tip of the string to do the cutting;donotforcestringheadintouncutgrass.Useedgeguidealongsuchthingsas
12 •Alignthetabsonthespoolcapwiththeslots(R1)inthehousing(figure R). •Pushthecapontothehousinguntilitsnapssecurelyintopla
13maIntenanceWARNING: Toavoidseriousinjury,removethebatteryfromthetoolbeforeperforminganymaintenance.1. Keeptheairintakeslots clean
trouble shootIng contInueD14IMPORTANT: ToassureproductSAFETYandRELIABILITY,repairs,maintenanceandadjustmentshouldbeperformedbyauthorized
15ImportedbyBlack&Decker(U.S.)Inc.,701E.JoppaRd.Towson,MD21286U.S.A.factoryreplacementparts,contacttheBlack&Deckerlocat
16TAILLE-BORDURE / COUPE-BORDURE AVEC PILE AU LITHIUM DE 40 V MAX* VOICI DES RENSEIGNEMENTS IMPORTANTS QU’IL VOUS FAUT CONNAÎTRE :•Lepare-maindoit
17LIGNES DIRECTRICES EN MATIÈRE DE SÉCURITÉ - DÉFINITIONSIlestimportantquevouslisiezetcompreniezcemoded’emploi.Lesinformationsqu’ilconti
18lieuxhumidesoumouillés.Suivretouteslesdirectivesdecemoded’emploipouruneutilisationadéquatedevotreoutil.Nepasutiliserl’outilso
19MISE EN GARDE : danscertainescirconstances,lorsquelechargeurestbranchéaublocd’alimentation,lechargeurpeutêtrecourt-circuitépardes
SAFETY GUIDELINES - DEFINITIONSItisimportantforyoutoreadandunderstandthismanual.TheinformationitcontainsrelatestoprotectingYOURSAFE
20Calibre de fil minimum recommandé pour les rallonges•Ne pas installer le chargeur sur un mur ni le fixer de manière permanente sur toute surface.
21où la température peut atteindre ou dépasser les 40 °C (105 °F) (comme dans le
22PILE LAISSÉE DANS LE CHARGEURLechargeuretlebloc-pilespeuventêtrelaissésbranchés,levoyantDELvertdemeurantallumé.Lechargeurmaintiendr
23AVERTISSEMENT : Avantlemontage,s’assurerquel’outilestéteintetquelebloc-pilesaétéretiré.OUTILSREQUISPOURL’ASSEMBLAGE(NONFOURNIS):
24RÉGLAGE DE LA HAUTEUR DE L’OUTIL (FIGURE H)MISE EN GARDE : Réglezlalongueurdelatondeuseàobtenirdespostesdetravailappropriées,commeindi
25 Pourlacoupeenbordure,latêtedecoupedoitsetrouverdanslapositionindiquéeparlafigureK.Sicen’estpaslecas: •Retirerlebloc-
26CONSEJOS ÚTILES PARA CORTAR•Utilicelapuntadelacuerdapararealizarelcorte;noempujeelcabezaldelacuerdacontraelcéspedsincortar.Pa
27l’œillet(R2),figureR. •Prendrelabobineneuveetl’enfoncersurlasaillie(Q2)duboîtier.Fairepivoterlégèrementlabobinejusqu’àcequ’
28entretIenAVERTISSEMENT :Pouréviterdesblessuresgraves,éteindreetdébrancherl’outilavantd’effectuertouteopérationd’entretien.1.Mainteni
29InformatIon sur les reparatIonTouslescentresderéparationBlack&Deckersontdotésdepersonnelqualifiéenmatièred’outillageélectrique;
3whichitisabletocuteffectively. •USE THE RIGHT TOOL–Donotusethistoolforanyjobexceptthatforwhichitisintended. •DON’T OVERREAC
30DE PODADORA / BORDEADORA DE LITIO DE 40 V MAX*MANUAL DE INSTRUCCIONESINFORMACION CLAVE QUE DEBE SABER:•Elprotectordebeinstalarseantesdepoda
31PAUTAS DE SEGURIDAD/DEFINICIONESEsimportantequeleaycomprendaestemanual.LainformaciónquecontieneserelacionaconlaproteccióndeSUSEGU
32gaseosasoexplosivas.Losmotoresdeestasherramientasnormalmentechispean,ylaschispaspuedenencenderlosvapores.• GUARDE LAS HERRAMIENTAS
33CONSERVE ESTAS INSTRUCCIONESLaetiquetadesuherramientapuedeincluirlossiguientessímbolos.Lossímbolosysusdefinicionessonlossiguientes:
34Tamaño mínimo recomendado del conductor para los cables de extensión•No coloque objetos en la parte superior del cargador ni coloque el cargador
35ADVERTENCIA: Riesgo de quemaduras. El líquido de la batería puede encenderse si se expone a chispas o llamas. • Carguelospaquetesdebateríassol
36RETRASO POR PAQUETE CALIENTE/FRÍOCuandoelcargadordetectaquelabateríaestáexcesivamentecalienteofría,comienzaunRetrasoporpaquetecalie
37INSTALACIÓN Y EXTRACCIÓN DEL PAQUETE DE BATERÍASADVERTENCIA:Asegúresedequeelbotóndebloqueoestéaccionadoparaevitarelaccionamientodelin
38INSTALACIÓN DEL MANGO AUXILIAR (FIGURAS F Y G)•Empujeelmangoauxiliar(F1)sobreeltubo(F2).•Inserteelperno(G1)porlosorificiosdelmang
39•Quitelabateríadelaherramienta.•Mantengaoprimidoelbotóndeliberacióndelcabezal(I1).•Mientrassostieneelmangoauxiliar,gireelcabe
4SAVE THESE INSTRUCTIONS: Thismanualcontainsimportantsafetyinstructionsforbatterychargers.•Beforeusingcharger,readallinstructionsandc
40FUNCIONAMIENTO DE LA PODADORA•SostengalaherramientacomosemuestraenlaFiguraN.•Mantengaunángulodecortede5a10gradoscomosemuestra
41•Otraspiezasderepuesto(protectores,tapasdecarrete,etc.)estándisponiblesenloscentrosdemantenimientodeBlack&Decker.Paraencon
42Pararebobinarlacuerda,sigalospasosacontinuación:•Quitelabateríadelaherramienta.•Quiteelcarretevacíodelaherramientacomosedescr
43DETECCION DE PROBLEMASPROBLEMA Laherramientafuncionalentamente.Laalimentaciónautomáticadecuerdanoalimentamáscuerda.SOLUCIÓN •Extrai
44PROBLEMA LacuerdasedesenrollaalquitarlatapaoelcarreteSOLUCIÓN •Antesdequitarlacuerda,asegúresedesujetarlaenlasranurasderetenc
45Lasegundaopciónesllevaroenviarelproducto(confletepago)aunCentrodemantenimientopropiooautorizadodeBlack&Deckerparasurep
46Grupo Realsa en herramientas, S.A. de C.V.SúperManzana69MZ.01Lote30(Av.Torcasita)Col.PuertoJuárezCancún,QuintanaRooTel.01998884722
48Cat.No.LST136 FormNo.90601709 September2013Copyright©2013Black&Decker PrintedinChinaBLACK&
necessary.Use of improper extension cord could result in risk of fire, electric shock, or electrocution.•An extension cord must have adequate wire
6WARNING: Burn hazard. Battery liquid may be flammable if exposed to spark or flame. •Charge the battery packs only in Black & Decker chargers.
7IMPORTANT CHARGING NOTES1.Longestlifeandbestperformancecanbeobtainedifthebatterypackischargedwhentheairtemperatureisbetween60°F
tabclicksintoplace(Ensurethattheguiderails(D1)ontheguard(D2)arecorrectlyalignedwiththeguiderails(D3)onthetrimmerhead(D4)(fi
9ADJUSTING THE HEIGHT OF THE TOOL (FIGURE H)CAUTION: Adjustthelengthofthetrimmertoobtainproperworkingpositionsasshowninfigure N. •This
Produits connexes et manuels pour Tondeuses à gazon Black & Decker Edger LST136

 (44 pages)
 (4 pages)


 (28 pages)
© 2020, manymanuals.fr. Tous droits réservés | 1.016 s |
 Manymanuals.com
 Manymanuals.de
 Manymanuals.fr
 Manymanuals.it
 Manymanuals.pl
 Manymanuals.cz
 Manymanuals.es
 Manymanuals-pt.com
Commentaires sur ces manuels